How to blog in Buboflash
#blog #has-images
I think Buboflash has everything that is needed to use it as a blogging machine: WYSIWG editing, images, versioning and access control. You can publish an article in these steps:
Prepare search
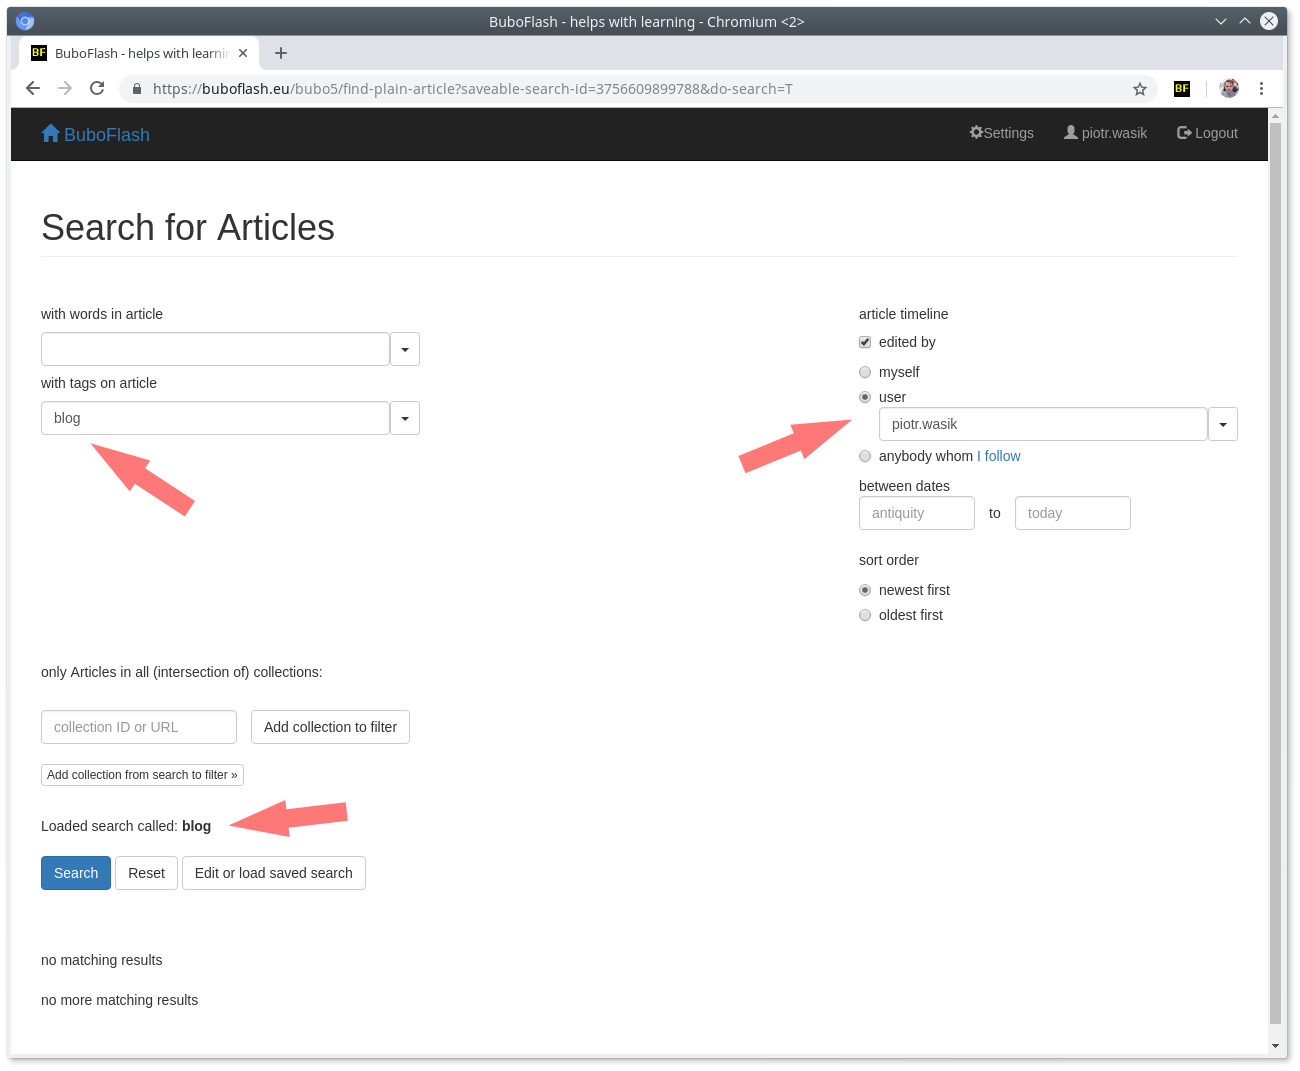
Start searching for articles:
- Only from specific user: your-username. It will not work for "myself" because "myself" always means current user, and if you share your search with a friend, he or she will run the search for their articles, not yours. Order showing newest first, it makes sense for blogging.
- Only with tags: "blog"
- Save this search under name "blog". You will see that in saved search for articles list (icon [≡] in the homepage)
- Assign a Public URL to your search, so it will be available under a name of your choice, e.g. https://buboflash.eu/public-urls/<your-username>/blog. This is the URL you can give to friends. In my case it is https://buboflash.eu/public-urls/piotr.wasik/blog. To assign a Public URL:
- Open your saved search in one browser tab
- Find "Public URL" in your homepage, open it and in "New file link" form type "blog" in filename (it will be the last part of the Public URL, https://buboflash.eu/public-urls/<your-username>/blog) and paste the URL for search from the address bar of the second browser tab.
in the screenshot below, I switched to source view and added class="img-responsive", so the image scales nicely. By the way, I changed CKEditor (the editor that Buboflash uses for WYSIWG) config so Enter is paragraph <p></p> and Shift+Enter is linebreak <br/>. You may need to hit F5 with editor open to refresh your cached version.
Prepare media for your article
- As I like seeing all resources I use for editing, I start with creating a search for images uploaded by myself, ordered by newest first. Refresh it when you add more images. I don't save this search though.
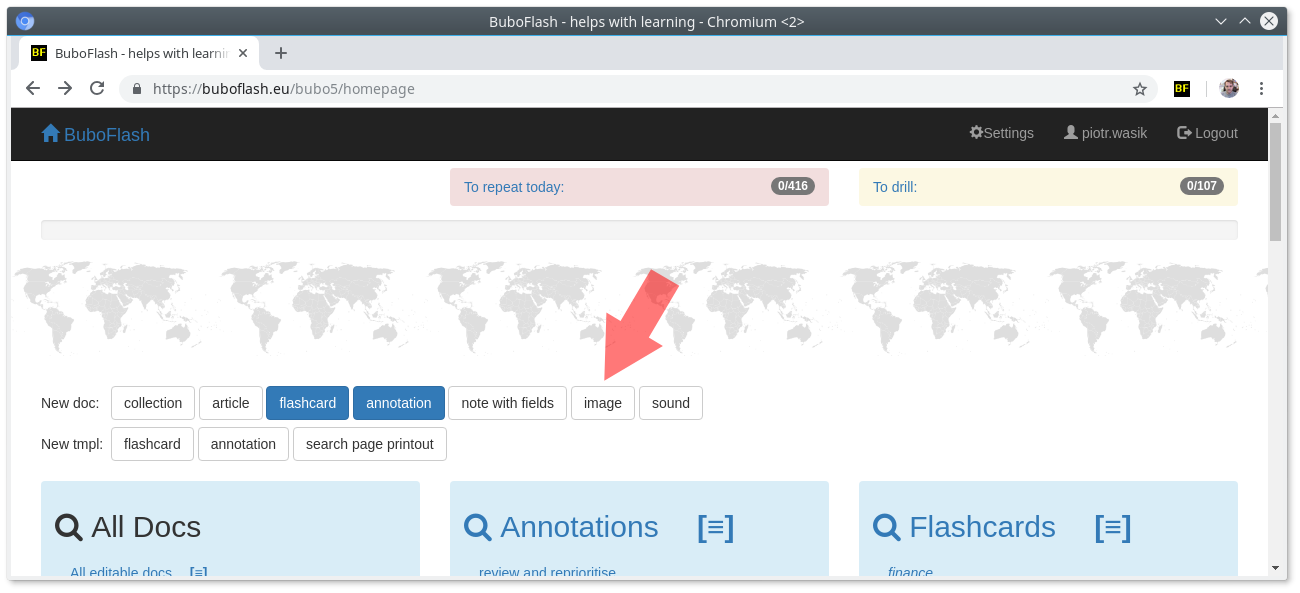
- You have to upload images separately, you start from your homepage, and click New doc: [Image], see below.
- For every uploaded image, I keep it open in separate tabs, and:
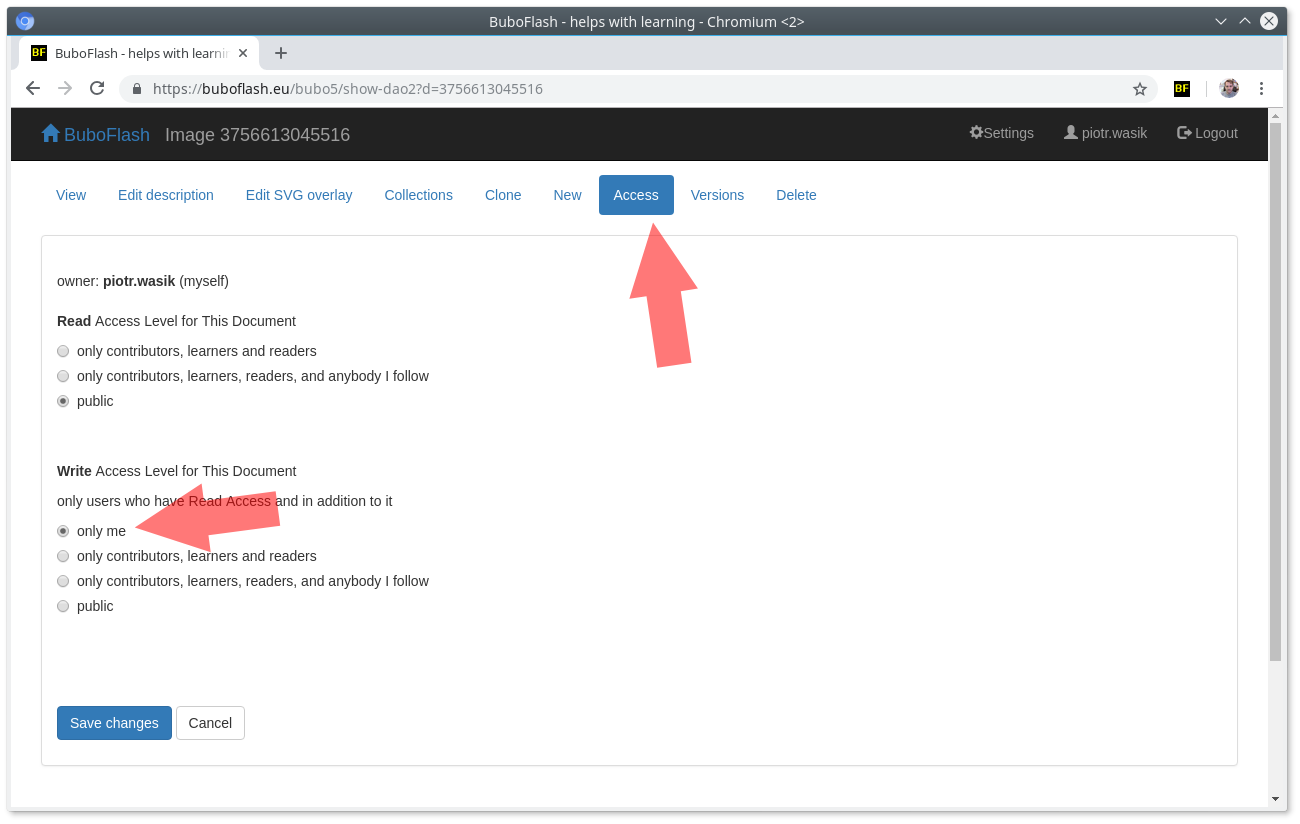
- I change Access level so only I can write on them - I don't want other people to change my "blog" article, see below.
- Make sure in settings maximum allowed image sizes are what you want, images larger than maximum allowed are scaled down by Buboflash on upload.
- In this particular case, I added red arrows using SVGEdit (the graphics editor Buboflash uses for image SVG overlays): contour width: 0, fill color: red, click on colour picker details, change opacity from "ff" to "88", so arrows are transparent a bit. Up arrow is available in "Shapes", resize it, rotate and then Ctrl+C / Ctrl+V (or right-click, select copy on popup menu, right click on background, select paste) to create as many arrows as you need. I prefer working on images in Buboflash directly as opposed to say in Gimp, because SVGEdit makes it easy to add actual objects on top of the image, in non-destructive way.
Edit your article
Create a new article and start editing it, remember: Enter is paragraph <p></p> and Shift+Enter is linebreak <br/>. You may need to hit F5 with editor open to refresh your cached version.
To insert an image into the article, go to one of the tabs with your images that you uploaded, and get the path from this section: "or paste this into WYSIWG editor as imagelink". The path looks like this: "/bubo5/show-image/3757611289868.png". By the way, in my Chrome, the only way to highglight it and copy to clipboard is to double click on it, the normal way to click and drag mouse does not work, does anybody know why? You push the "Image" button on the CKEditor toolbar and paste the imagelink there. Then, you may switch to source view and add class="img-responsive", if you want the image to scale down with the browser window.
Save it from time to time.
Make sure you limit access to this article like you did with images, so only you can modify it.
Publish it!
When you are happy, you can edit it again, and add a tag "blog" so your article will show up in search result for the search you saved before. Then, for pleasant reading, when viewing the article, push the "Open view for just reading" button at the top - then distraction free view will become default for new users. That is all, your article is published :-)